Opencart Store Locator Installation and Operating Manual

Introduction:
Welcome to the Opencart Store Locator Installation and Operating Manual!
This powerful feature is designed to streamline the management of your offline stores, enabling you to easily add and update location information. With the Store Locator, your customers can quickly find and visit your physical locations, enhancing their shopping experience. The intuitive interface allows for seamless updates directly from the Opencart admin panel, ensuring that your customers always have access to the most accurate store details.
In this guide, we’ll walk you through the setup and usage of the Store Locator, empowering you to improve accessibility and customer satisfaction with ease.
Features: Opencart Store Locator
- Admin can create, edit, and delete store locations.
- Customers can view store information on the front end.
- Feature to redirect to the store’s website directly by attaching a URL.
- Direct link on the store to locate the stores.
- Store locators use Google Maps to create store locations and display them in the store.
- Worked for both Logged-in and Guest Users.
Note:- Google Maps API is a paid service.
How to Guide Customers to Your Physical Stores Easily?
Installation: Opencart Store Locator
Steps to Install the Module
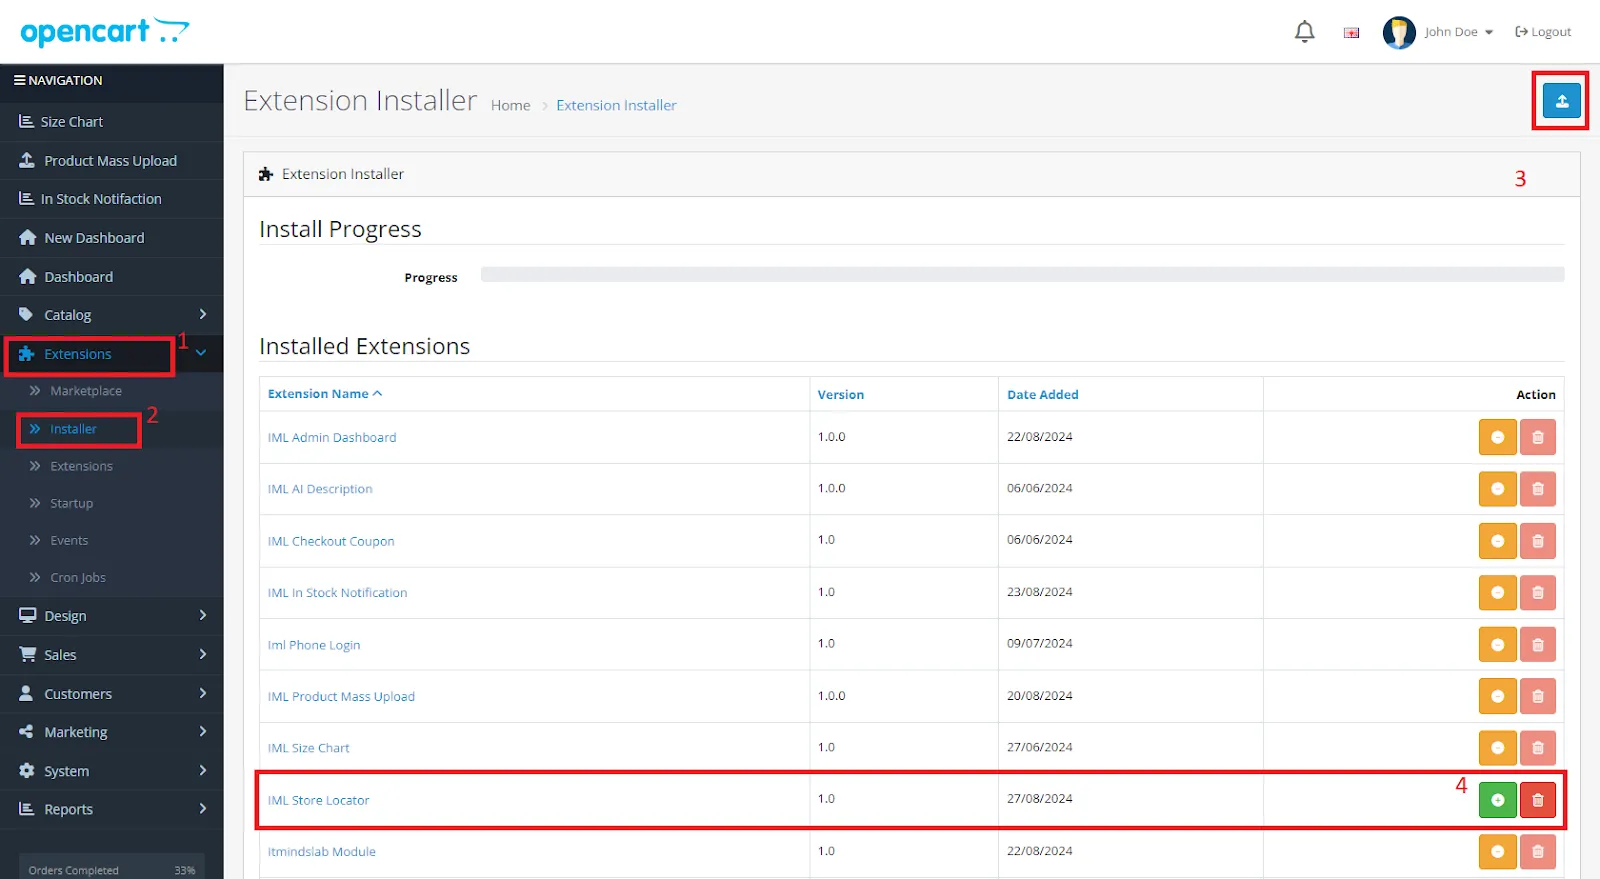
Go to Opencart’s Admin panel -> Extension -> Installer
- Go to Opencart’s Admin Panel
- Click on ‘Extensions’ to see the drop-down list, then click on ‘Installer.’
- After clicking on ‘Installer’, you will see a file upload icon on the top right of the page, as shown below. (After uploading, you need to save your file in your system with a name that ends with ‘.ocmod.zip’)
- You will see an entry with the module name on your screen. Click on the green button to install the module.
Permission: Opencart Store locator
Now, we need to grant permission for the module to the Administrators of the store.
Opencart’s Admin panel-> System-> User -> User Groups -> Edit Administrator
- Go to Opencart’s Admin Panel.
- Click on ‘System’ to see the drop-down list, then click on ‘Users.’
- In the ‘Users’ section, click on ‘User Groups.’
- Edit Administrator to allow permission to the user.

- Set access and modify permission for all related modules.

Configuration: Opencart Store locator
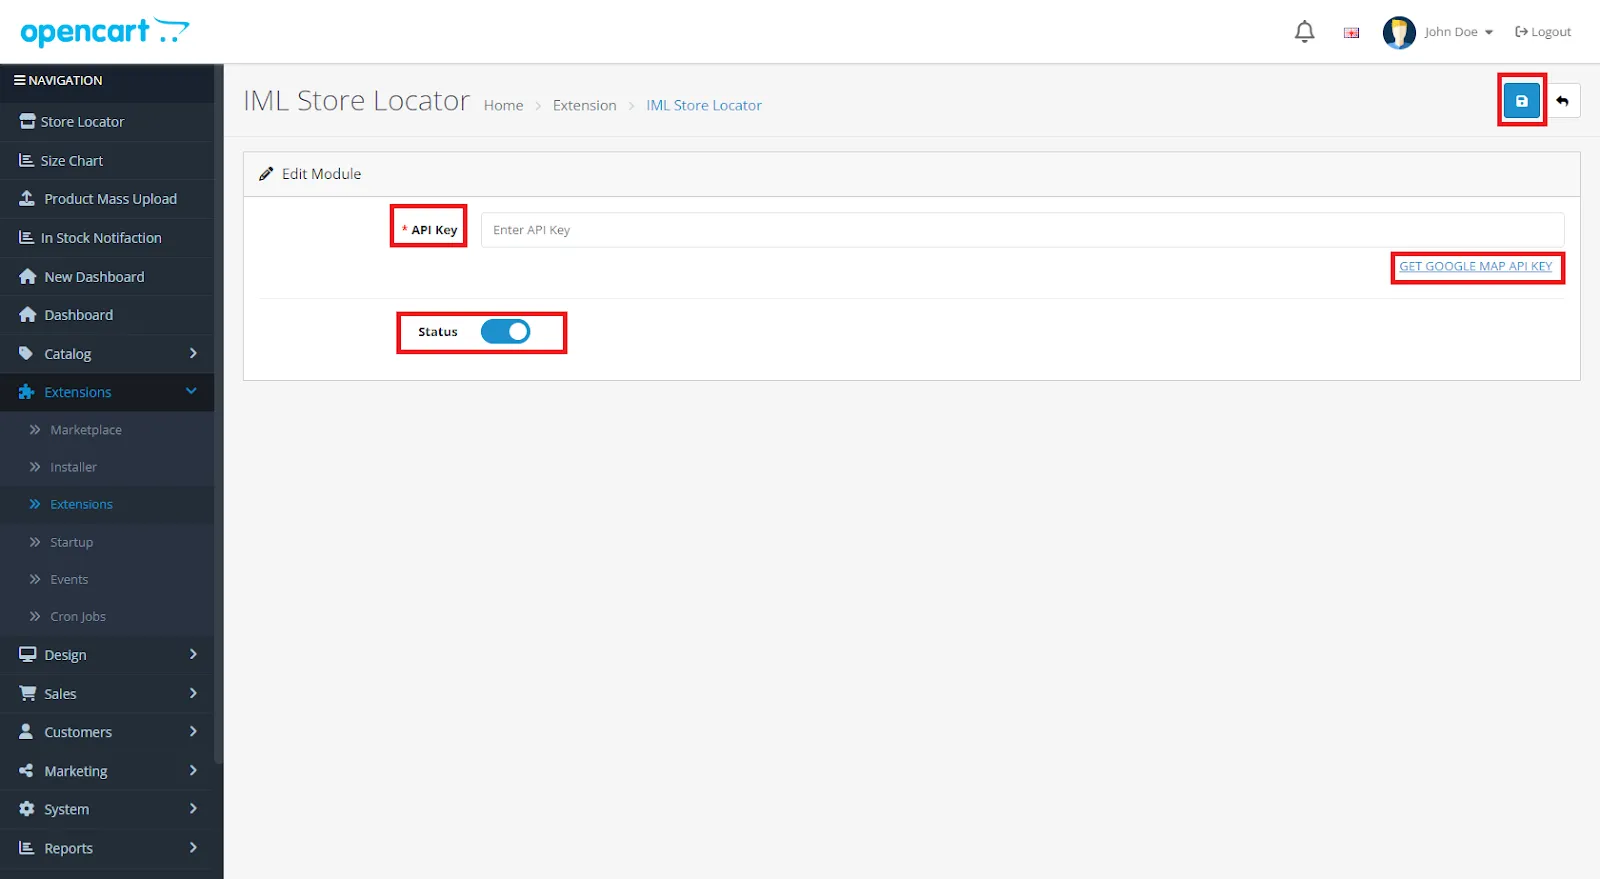
Opencart’s Admin panel-> Extensions-> Extensions-> Choose The Extension Type -> Modules-> IML Store Locator-> install and edit
- Go to Opencart’s Admin Panel and click on ‘Extensions’ to see the drop-down list.
- Again click on ‘Extensions’ from the drop-down list.
- Choose your extension type.
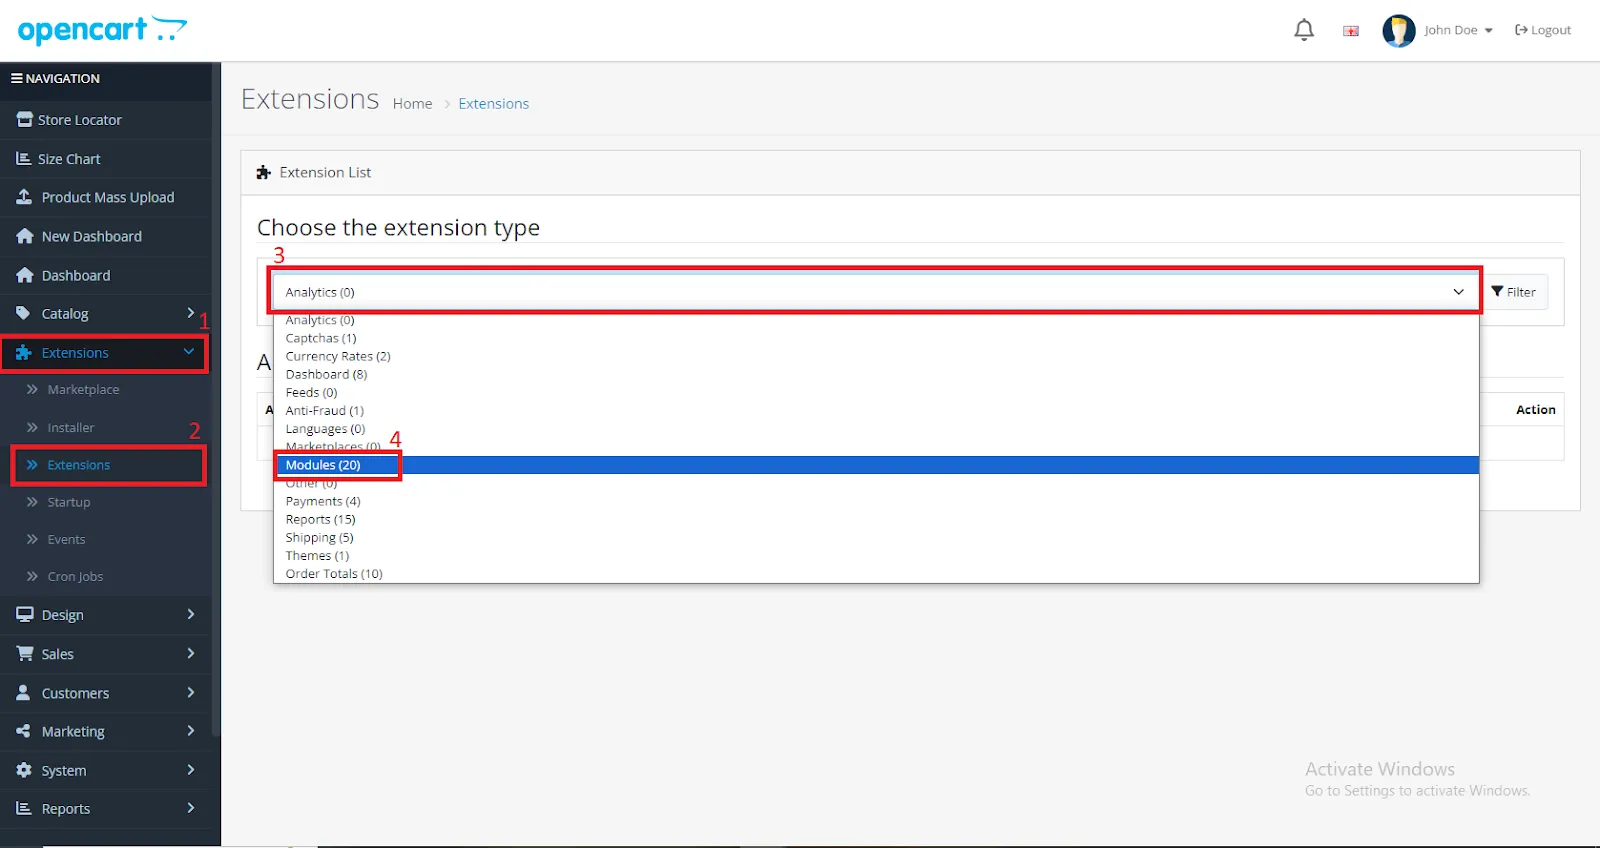
- Click on the green button and install the module.
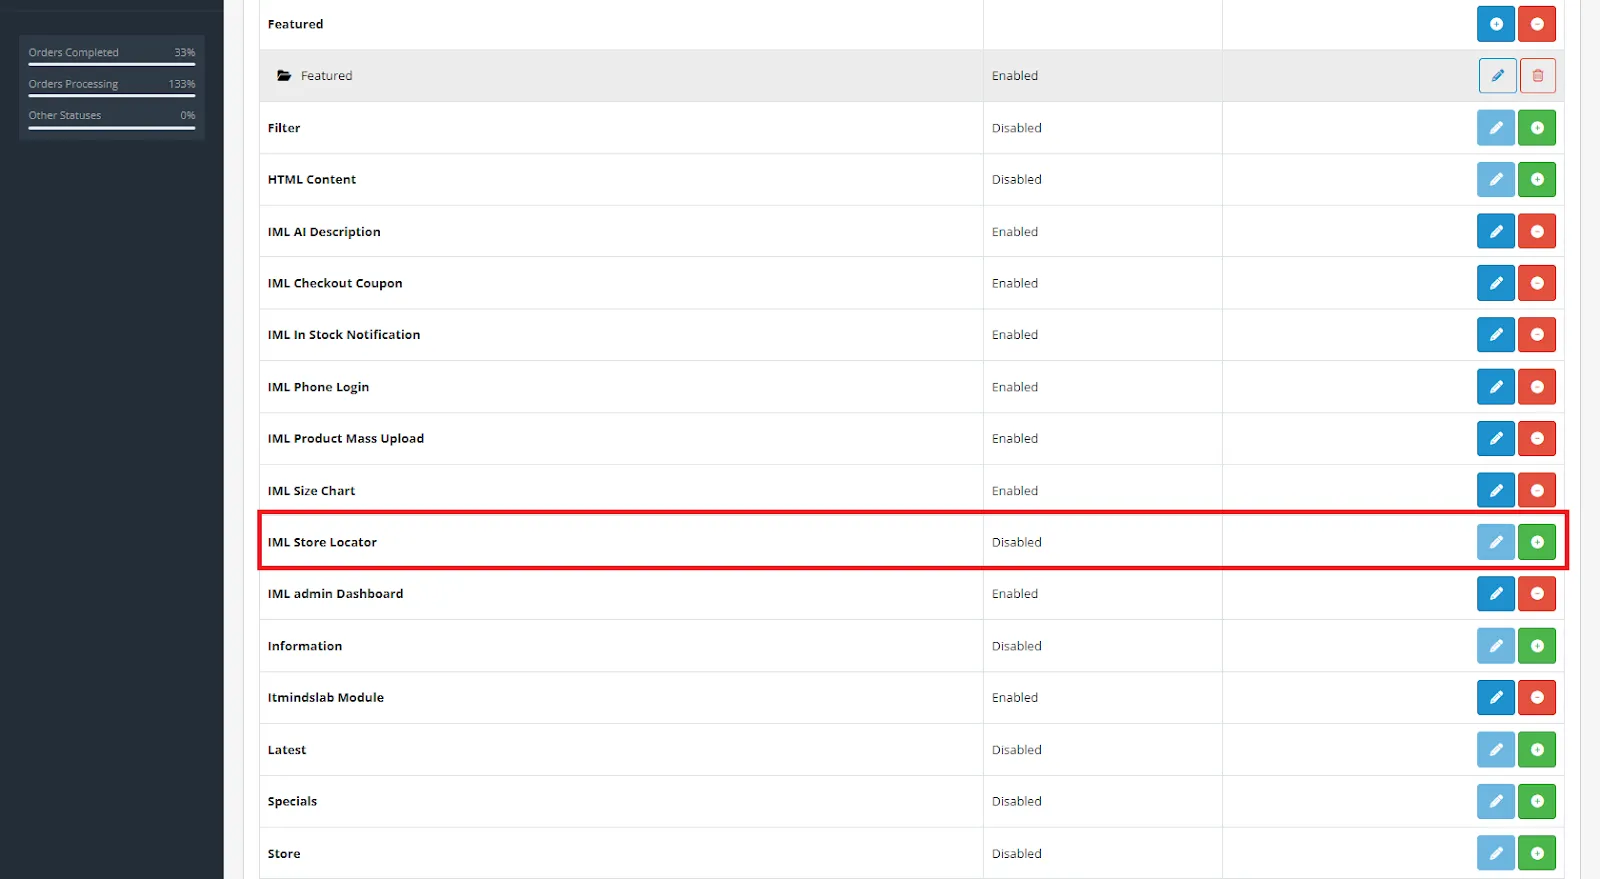
- Then click on the ‘Edit’ button.
- Enter your Google Maps API key and set the status to ‘Enabled’.
NOTE:- If you don’t have an API key then click on the “Get Map API Key” link. The link will redirect you to the Google Map API account where you can purchase a new one from there.
So, here we complete the module installation, permission, and configuration part.
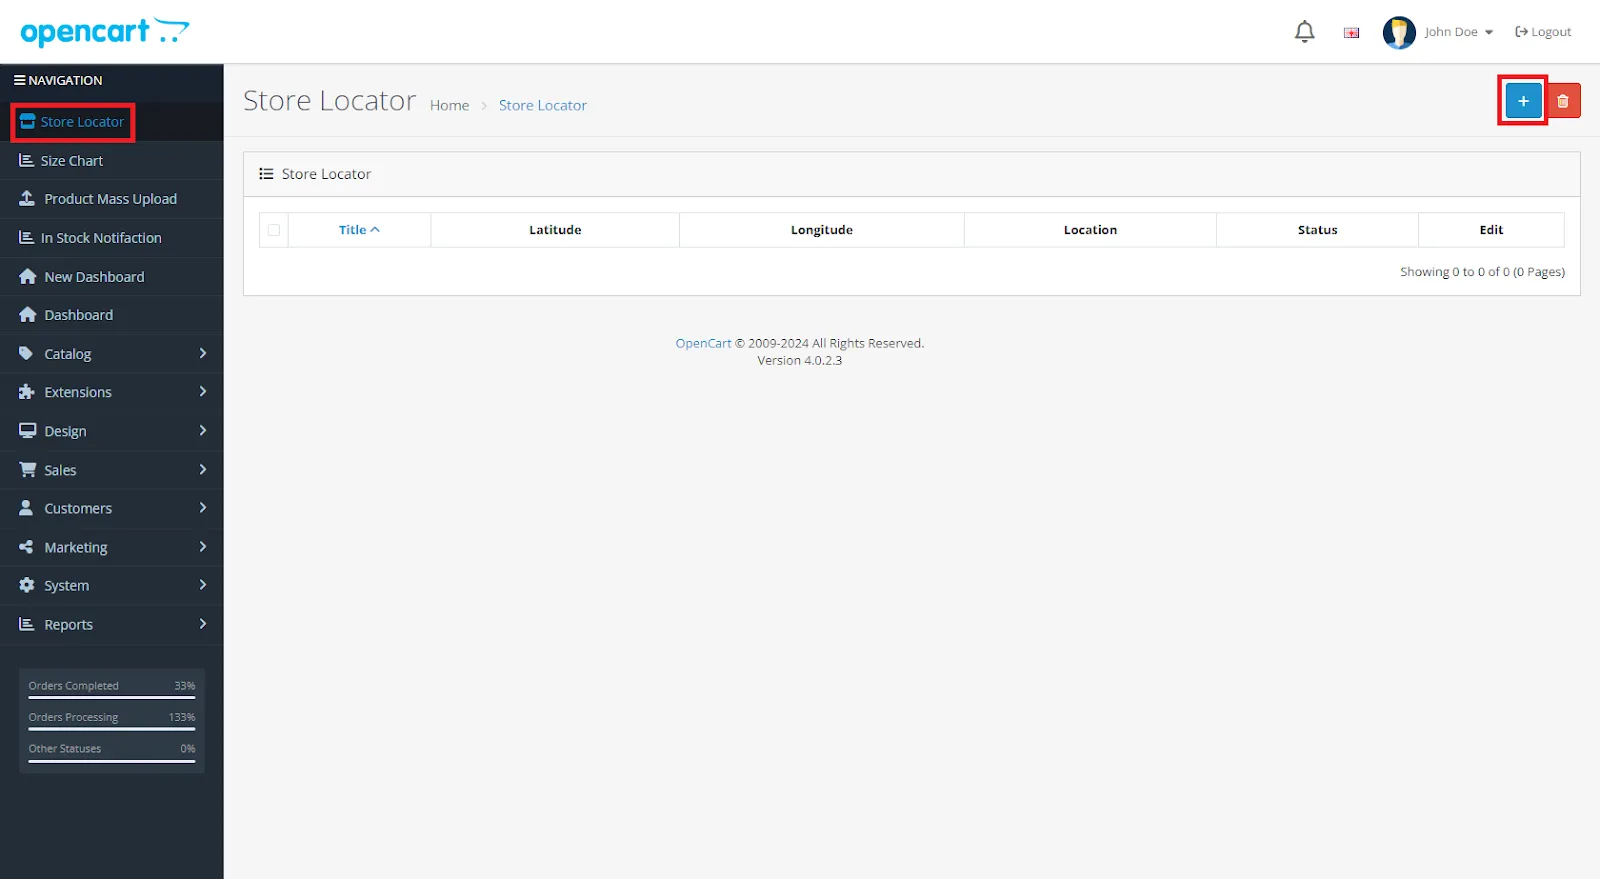
The admin will see the option Store Locator in the menu. The admin can create multiple store locations by clicking the create (+) button.
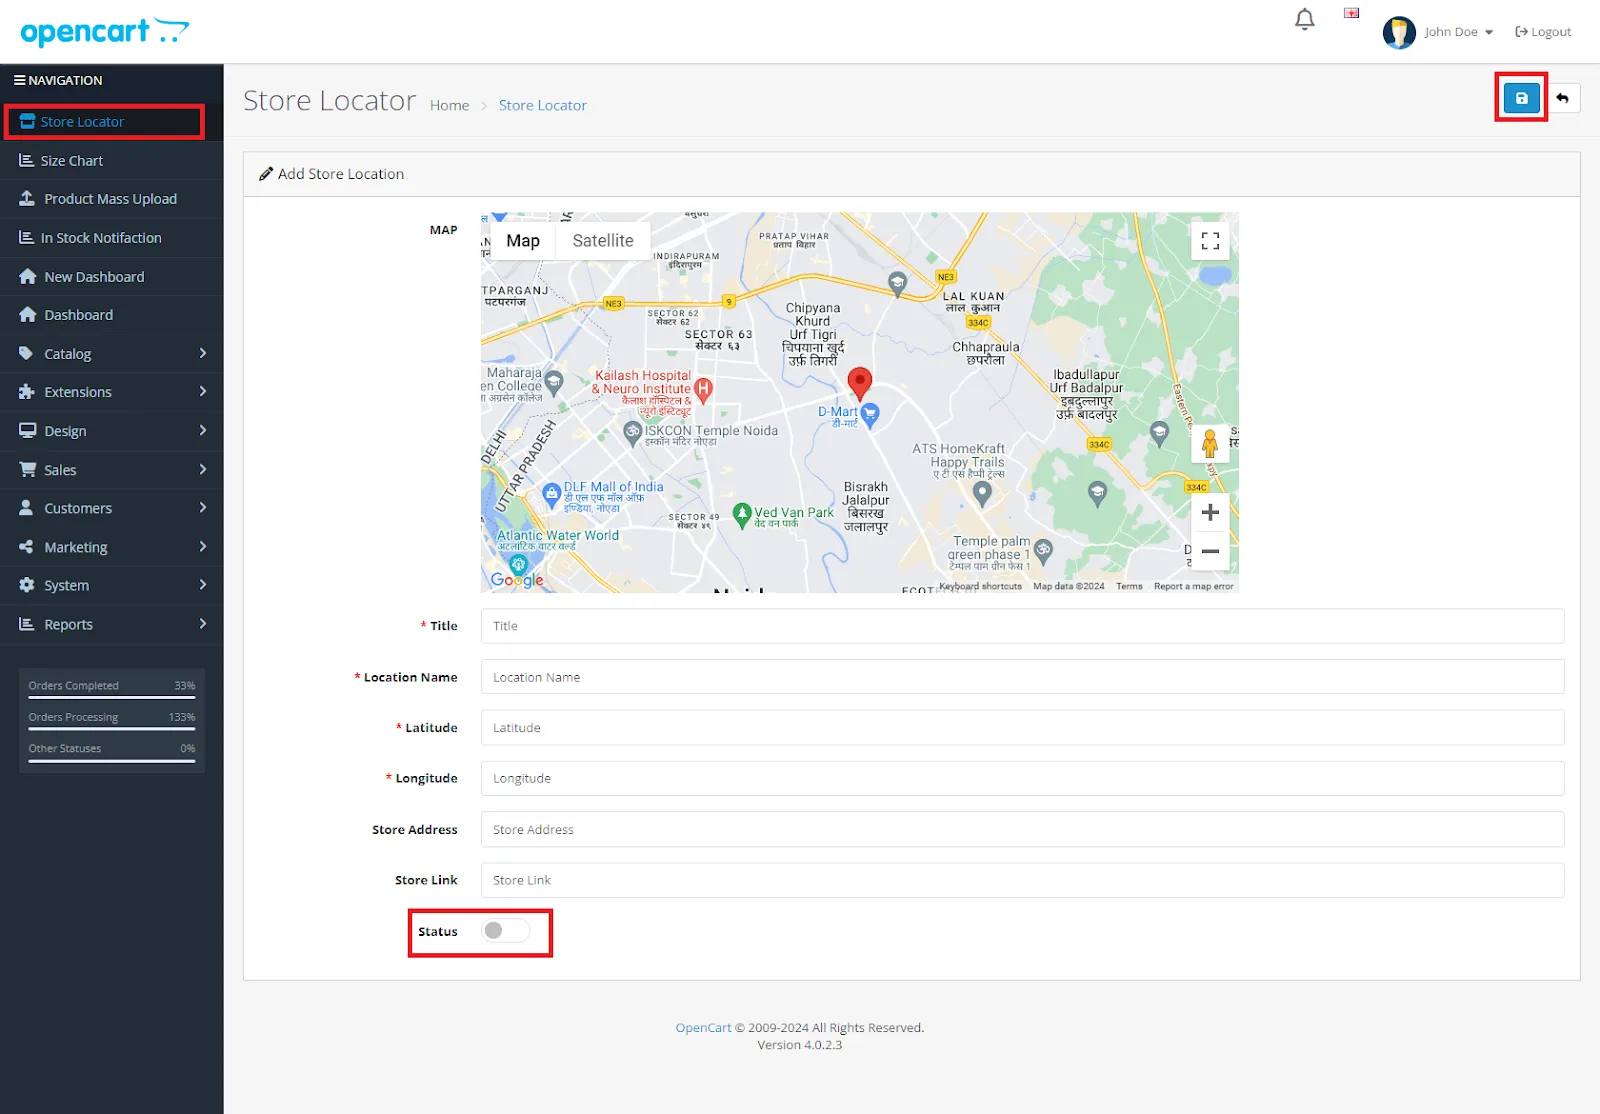
Title: Store name.
Location name: Location name for easy search.
Latitude: Store Latitude coordinates.
Longitude: Stores Longitude coordinates.
Store address: Store complete address.
Store link: Store website link.
Status: Enable and disable the store.
Store view
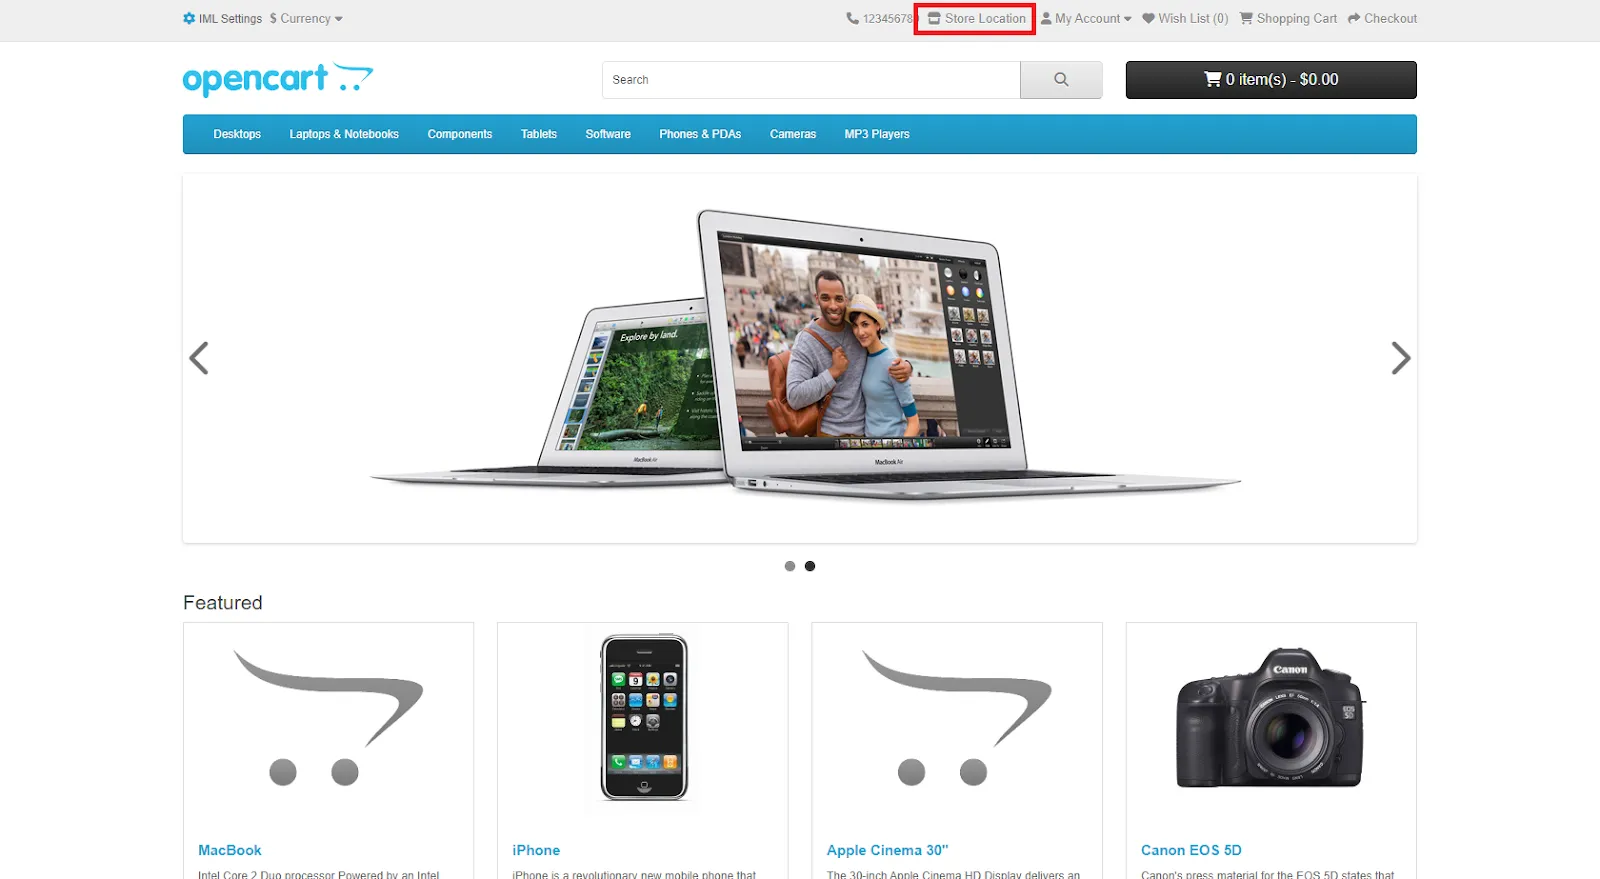

Customers will see all the enabled stores and their locations on a map along with their details such as name, address, and website link.