Opencart Recently Visited Products Installation and Operating Manual

Introduction:
Do you want to make it easier for customers to find products they’ve recently browsed? Are you looking for ways to customize the layout and appearance of the “Recently Viewed Products” section? The Opencart Recently Viewed Products module is designed to give admins complete control over the appearance and functionality of recently viewed items, allowing for a tailored shopping experience.
This guide will walk you through the steps for installation, setup, and customization to help you create a seamless viewing experience for your customers.
Features: Opencart Recently Viewed Products
- Easy to install and set up.
- Applicable for both logged-in customers and guest customers.
- Admin has the authority to set the number of products to be saved as recently viewed products and can also limit the products to be shown in the recently viewed products tab.
- The admin can also set the height and width of the recently viewed products tab.
- The admin can display it anywhere in the store using the admin’s Disegin option.
Installation: Opencart Recently Viewed Products
Steps to Install the Module
Go to Opencart’s Admin panel >> Extension >> Installer.
- Go to Opencart’s Admin Panel and click on ‘Extensions’ to see the drop-down list.
- Then click on ‘Installer’ from the drop-down list.
- After clicking on ‘Installer,’ you will see a file upload icon on the top right of the page, as shown below. (Before uploading, you need to save your file in your system with a name that ends with ‘.ocmod.zip’).
- You will see an entry with the module name on your screen. Then, click on the green button to install the module.
Interested in Elevating Shopping Through Recently Viewed Products?
Permission: Opencart Recently Viewed Products
Now, grant the store administrators permission to edit the module.
Opencart’s Admin panel >> System >> User >> User Groups >> Edit Administrator
- Go to Opencart’s Admin Panel and click on ‘System’ to see the drop-down list.
- Then click on ‘Users’.
- When you click on ‘Users,’you will see a drop-down list. Then click on ‘User Groups.’
- Edit Administrator will allow permission for the user.

- Set access and modify permission for all related modules.

Configuration: Opencart Recently Viewed Products
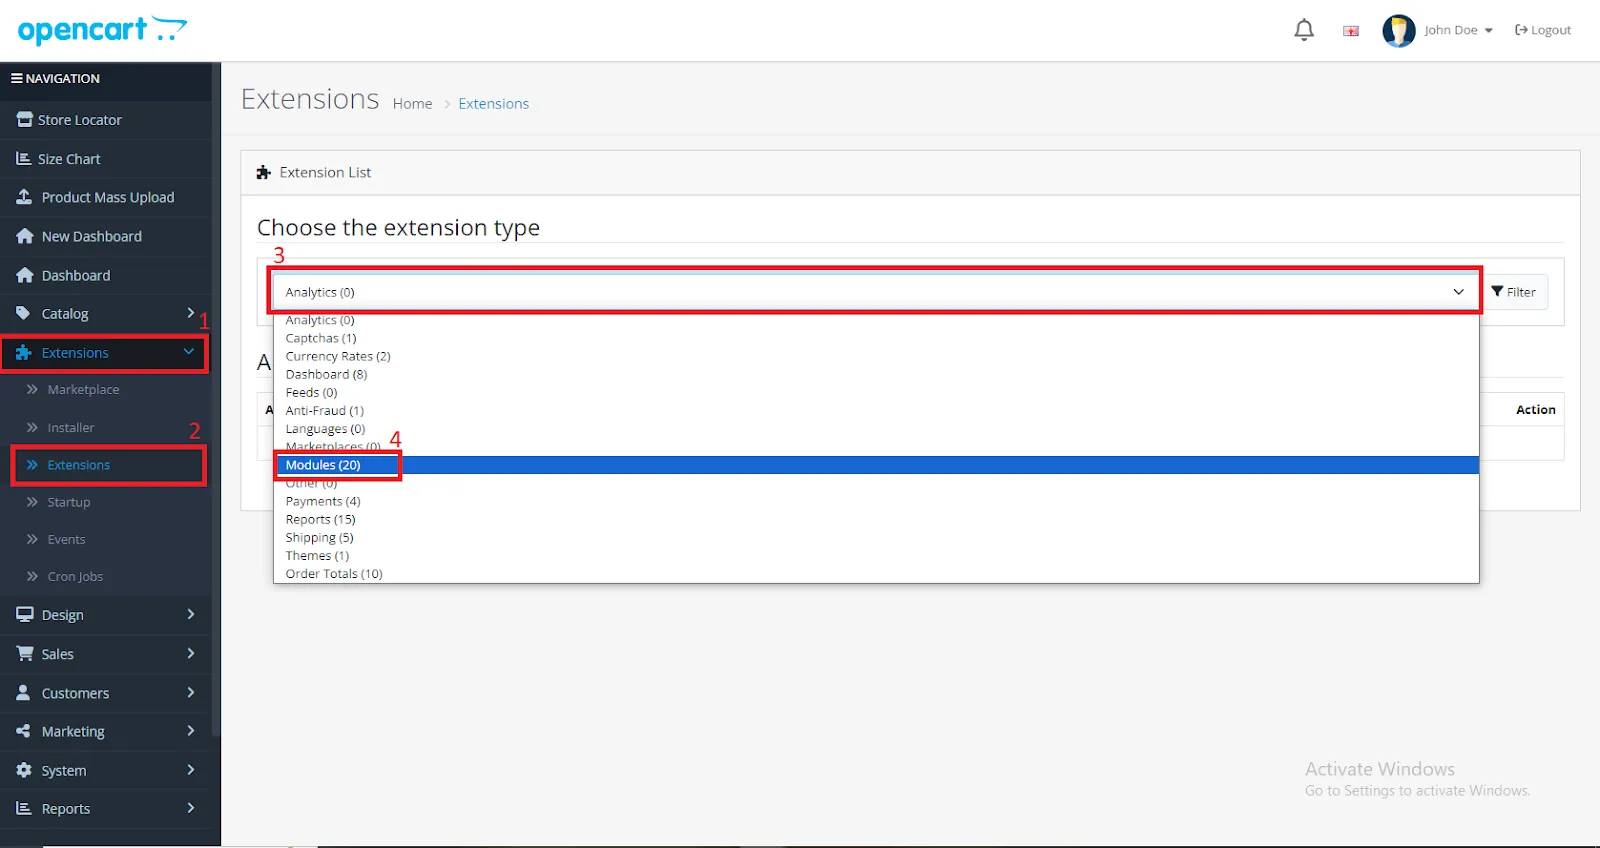
Opencart’s Admin panel >> Extensions >> Extensions >> Choose The Extension Type >> Modules >> Iml In Stock Notification >> Install and edit.
- Go to Opencart’s Admin Panel and click on ‘Extensions’ to see the drop-down list.
- Again, click on ‘Extensions’ from the drop-down list.
- Choose your extension type.

- Click on the green button and install the module.

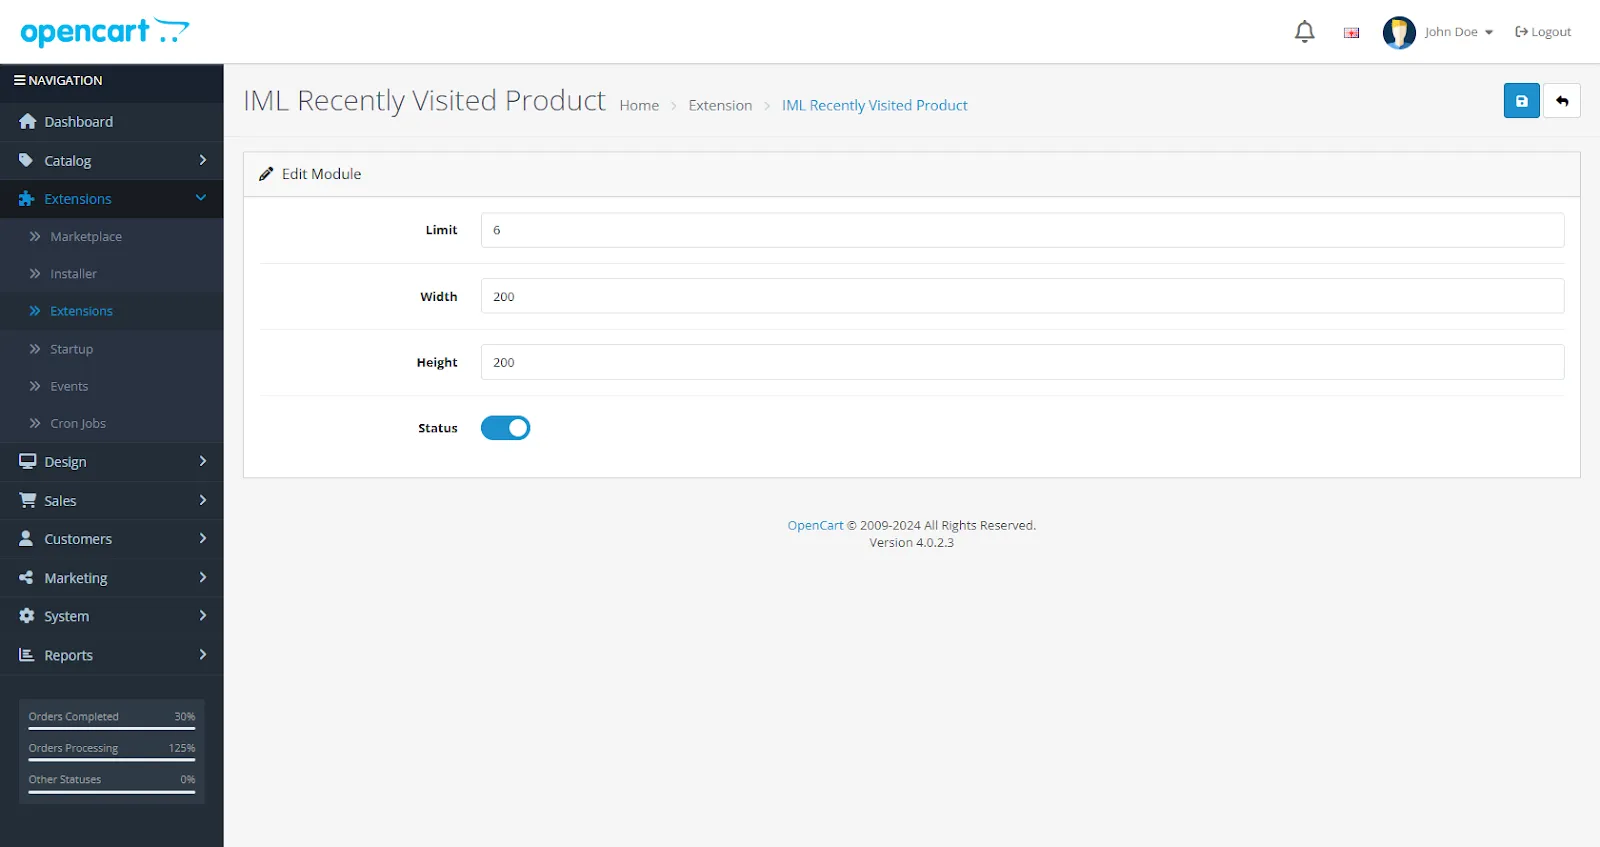
- Click the edit button.
- You can set the limit for the number of products displayed in the recently viewed products tab and also the tab’s height and width.
- Set the module status to ‘Enable’ and save.

So, here we complete the module installation, permission, and configuration part.
Set Module Layout: Opencart Recently Viewed Products
Opencart’s Admin panel >> Design >> Layout >> Select the page >> edit
(for example, I am setting it on the home page.)

Choose the position for the module you want to set. After clicking on the edit button, you will see a list of multiple modules. Select the ‘IML Recently Visited Product’ module and save.

Store View
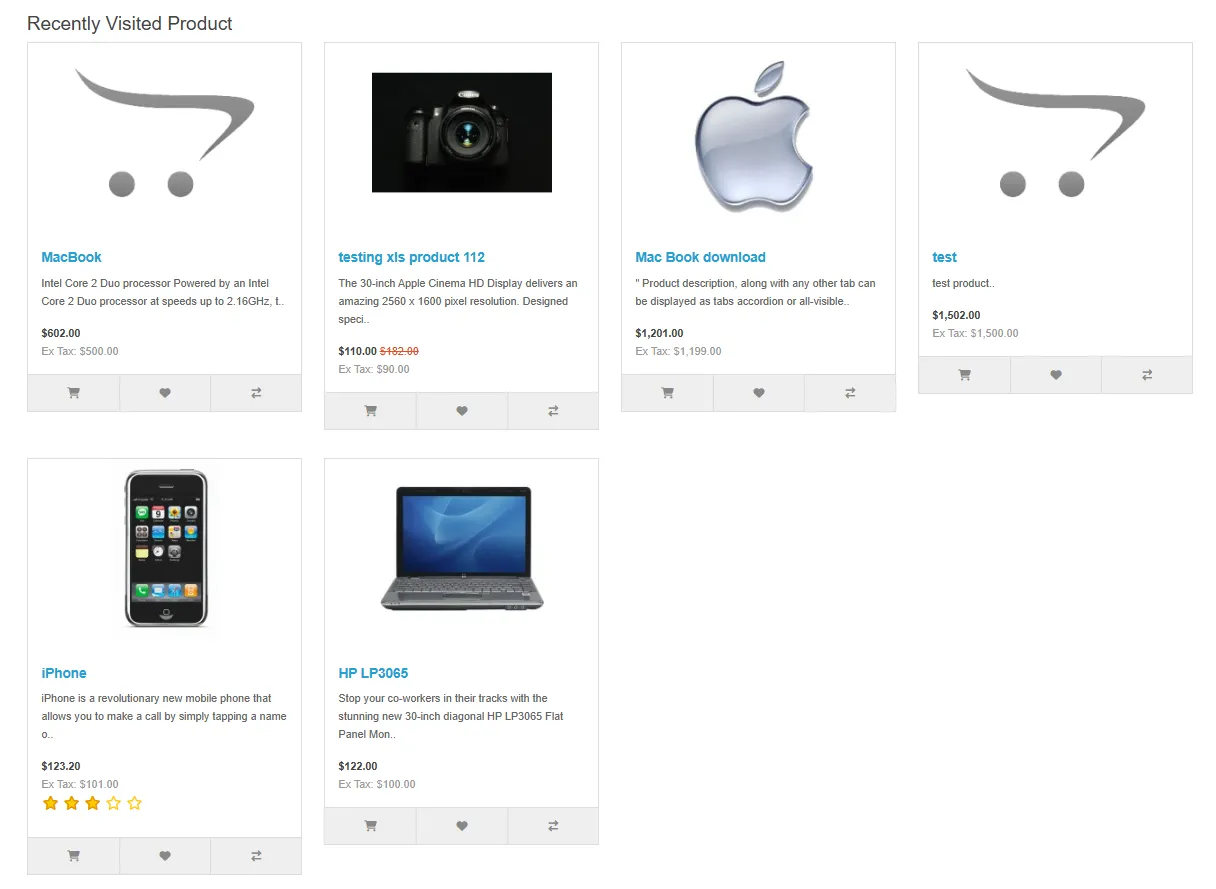
When a customer views a product, it is added to the “Recently Viewed Products” section, which is displayed in the location specified by the admin in the design settings.


